Physical Prototype Processes
In this post I will show my physical prototype process. First I started doing first floor's design. I used real dimensions of room and did in 1/50 scale. However I didn't measure the height so I did from my mind and made shorter to see better inside but I should have make higher to understand the space well and design for that. After I measured every wall in 1/50 scale I cut them off from mountboard and then combined them with PVA glue. I also cut the windows and doors then I added the lift in the corner.


Then I started making furniture. For this process I also looked the real dimensions and used 1/50 scale to reach best outcome. This part was hard for me especially the chairs, I had to make tiny pieces and sticked them with glue. I tried to make the essentials in this physical model because I had a limited time and this was an exercise. I did chairs, tables, sofa cupboard and bookshelf. After I finished making furniture models I started placing them this helped me to see all space design. I didn't fix the furniture so I changed their place and looked at different design options. 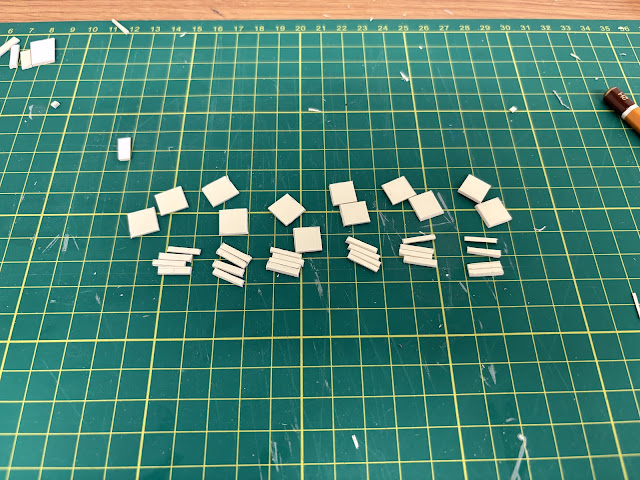

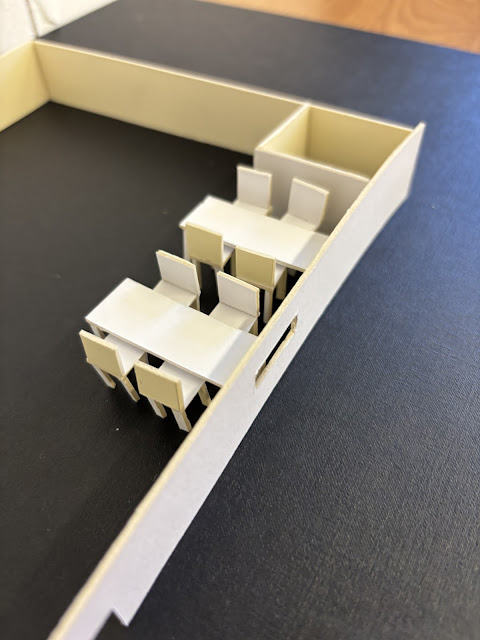


This is the final outcome of first floor's design. I tried to placed them in best way. In future, I will try different placement and try to finalise my space planning idea. I will use this small model to visualise the space while I am deciding everything like furniture, material, lightning and decorations.
I enjoyed making these models but it took my time more than I expected and also I struggled while making tiny figures. Even though I used real measurements of room and furniture it looked big in space because I did the height shorter than normal. It was the first time that I made a architectural model so I made many mistakes and learned a lot. I will develop my modelling skills in future and make better architectural models.


For physical prototype I also wanted to make the sofa idea that I draw. I liked the idea but I struggled the place in room and made some changes on it. I used cardboard to make the sofa. First I curved wall between sofas. I bended the cupboard and place on other cupboard. To save this curved shape I had to glue onto cardboard. Then I cut the sitting part and also curved them. I used 2 pieces to make the sitting part. After I made two sides , I made the tables and placed them in the centre of rounds. Then I made the side tables which is connected to the sofa.


These are the final outcomes. I am happy with results , I enjoyed making models. While finalising my project I will use and think about these outcomes and try to develop in future to add my project.
I will present these ideas and prototypes in focus group presentation than I will get feedback from my classmates and use them to improve my ideas.


Good effort here, Nihal, good to see you trying out the whole space and elements that might be included. Would like to see you continue with this into Block Two, where you are looking at how you might create a model of the ground floor space in the same way.
ReplyDeleteWould also like to see a post on furniture etc that would be necessary for a space like this - you visited the Queens building in Week 3 with Billie, post the images you took over there and discuss how that space works - how might it impact what you are doing here?